


 Here's a step by step guide on how to assemble a Kanban Wobblers kit. These cute kits are really unusual and a Wobblers card will really stand out on the mantlepiece! In addition to the kit, you will need double sided adhesive tape (or other adhesive of your choice); foam pads and acetate, card or paper for the rocker base.
 The two sheets which form the kit are pictured above. Pop out the die cut components - I find it easiest to snip the tiny tags holding them to the sheet with a craft knife, to ensure a neat finish.
 To make the rocker stand, use the template and trace it onto sturdy card or acetate, then cut out. Alternatively, you could decorate the template itself (which is very sturdy) by covering it with paper or drawing / painting on it with your own designs.
 I decided to make my rocker base out of black pearlescent card. The rocker base then needs to be creased with a bone folder and folded in half.
 Attach the legs to the body of the wobbler using 3D foam pads.
 Use one of the template strips (I used the one with rounded ends) to attach the head to the body of the Wobbler. You can trace the template on to acetate for this, if you prefer.
 Attach the Wobbler body to the rocker stand, using 3D foam pads or tape on both sides.
 I used another of the template strips inside the rocker stand, secured with double sided tape. The card can still be folded flat to post, but this ensures that the rocker stand will remain upright (and not open so far that it falls flat) when the card is on display.
 Finally, add the Wobbler's tail and decorate with other die cut elements as you wish, using foam pads and double sided tape.
 A selection of cute Wobblers kits is available at Foil Play, along with co-ordinating topper sheets and rubber stamps too.
 Traditional step by step decoupage can be very therapeutic. I enjoyed cutting out the decoupage elements for this simple Get Well card, made for a German Shepherd dog owner. I layered up the elements using self adhesive foam pads.
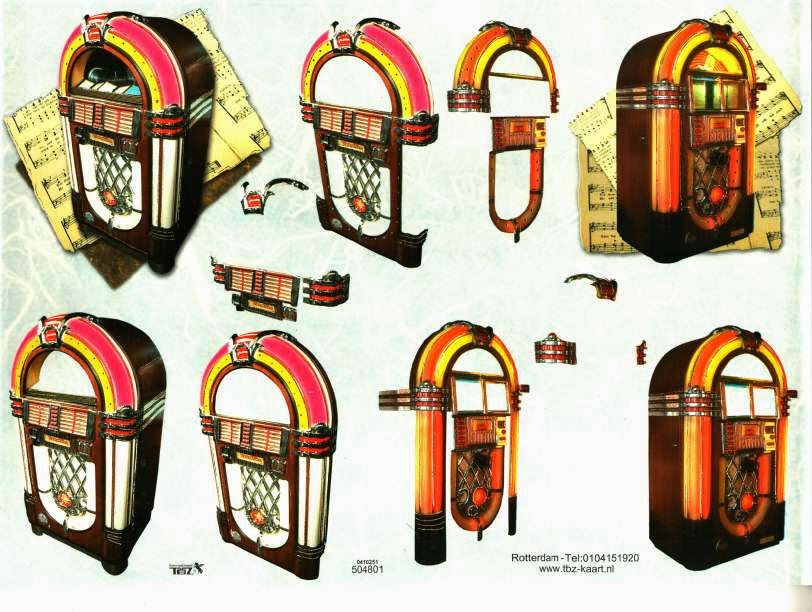
 The Le Suh decoupage sheet that I used to make the card is pictured above.
 Many step by step decoupage sheets and topper sheets have been reduced to 65p a sheet at Foil Play - check out the Special Savings category for more details.
 There is plenty to choose from, for all occasions. Sheets in the special savings offer include:
 Sandra Kuck step by step, stack-its and multi image sheets;
 Many Redhotbed sheets:
 Check out issue 34 of Papercraft Essentials magazine for a feature (pages 68 - 70) using the peel offs pictured.
 Papercraft Essentials costs £3.99 and issue 34 comes with a Stamping Essentials ideas Christmas special magazine and Christmas designer paper pack, with papers, templates and card blanks.
 These step by step decoupage sheets from British company Craft Creations are very high quality, yet only 49p a sheet at Foil Play! Each acid and lignin free sheet contains a step by step decoupage project plus co-ordinating design elements.
 The sheets are suitable for a wide range of occasions, designs include:
 These are traditional decoupage sheets, so scissors are needed! Cut out the step by step elements and layer them up with foam pads or silicone adhesive to create beautiful, detailed 3D toppers for your card and craft projects.
 This project gives step by step instructions to make an Egyptian themed A4 card, featuring a Dufex postcard topper, which makes a great focal point for a larger card.
 To start with, I needed:
 Score both pieces of the moondust card approximately 1cm from the long edge of the card. The scored edge will form the spine of the card.
 Place the postcard topper on the reverse of the mirror card, and mark in pencil where you need to cut, to form the backing mount.
 Cut the mirror card backing to size using your trimmer; cut out two of the Dufex greetings toppers (one is for the inside of the card); cut a backing mount for one of the card greetings in mirror card and cut a piece of the Egyptian icons backing paper to size for the front of the card.
 Put double sided sticky tape on the back of both pieces of mirror card, the backing paper and one Dufex greeting. Put double sided foam pads on the rear of the Dufex postcard and the other Dufex greeting.
 Mount elements onto one piece of the moondust card, with the scored edge to the left, as shown. Whilst the Kanban ribbons are adhesive, I'd recommend using double sided adhesive tape also, to make sure that they stay stuck down.
 This is the inside of the card - I've stuck down the Dufex greeting flat, and added double sided adhesive tape. There are actually two lines of tape, but I've removed the covering tape for the first line, as there wasn't enough room to fit them side by side. Remove the cover from the second piece of tape, and adhere the front of the card to the back. I found that the easiest way to get the two pieces of card correctly positioned was to hold them parallel and upright (landscape) on a flat surface with the edges to be adhered at the top. It's easy then to manoeuvre the sheets together to exactly the right position.
 Adhere another piece of adhesive ribbon to the spine of the card, again using extra double sided adhesive tape, to be on the safe side.
 Carefully open the card and crease back.
 Voila, the finished card!
 Some great new decoupage sheets are now in store at Foil Play. 3D Photopics are high quality photorealistic decoupage sheets, in a wide range of designs, including pets, other animals and birds, flowers, zodiac and transport.
 This beautiful card has been designed by Andrea Dipple. The card uses the techniques:
 Start off by cutting 3 pieces of double-sided adhesive sheet slightly larger than the pieces of stamp board. Apply them to front of the stamp board, but before removing the upper protective sheet, trim the adhesive to snugly fit the stamp board. Remove the upper protective sheet and apply the rub on foil. Go back over with the foil to pick up any missed sections. Ink the outer edges of the stamp board with your coloured ink pad.
 Once the image has dried, remove the low tack masking tape from the reverse of the stamped images. You now need to liberally cover each of the stamped pieces with a Versamark Ink Pad. Then, working on a spare piece of creased paper to catch the excess, cover with clear embossing powder. Tap off any excess and return to the tub. Place the stamp board on a heat resistant work surface and heat with the heat gun until the embossing powder melts. As you carry out this process, the foiled background will bubble up slightly due to the heat, Do not worry! Firstly, almost all of the bubbles will disappear as the stamp board cools. Those that remain will only enhance the end result, as the image is meant to look like it is a reflection in an old, slightly distressed mirror.
 Next, cut and mat a piece of ribbed cardstock and adhere it to the front of your card blank.
 Apply double-sided sticky tape to the reverse of the stamp board pieces and adhere them to your card blank. I find it easier to apply the middle piece centrally and then align the top and bottom pieces accordingly.
 Voila, your card is finished!
 Paste the decoupage sheet onto the sheet of card or firm paper, I used a glue stick to do this. Although this step is in the instructions on the sheet, I'd say that you could probably make the project using the decoupage sheet on its own if you prefer.
 Cut out all the individual design elements from the sheet.
 Make holes where indicated for the brads. There are two of these on each character, two on the background and two on the long fence piece. I used my 'pokey tool' to make the holes, you could use a hole punch, or (if you are very posh!) a Crop-a-Dile.
 Assemble the scene using the brads. On the girl, the upper brad is fixed to the background, and the lower right brad to the fence piece. On the boy, the upper brad is fixed to the fence piece, and the lower brad (in his foot) is fixed to the background. Once the scene is assembled, you should be able to gently pull the fence piece, and the figures will move towards each other.
 Stick foam pads onto the back of the other cut out pieces - you can of course use silicone adhesive, if you prefer.
 Stick the decoupaged pieces on to the boy and girl figures, layer them up using the largest first to produce a 3D effect.
 Gently pull the fence piece, to make the boy and girl kiss - all together now, ahhhhh!
 Your moveable decoupage project is now complete, and can be added to your card or other craft project.